
Have you ever looked at a Sketching Facial Expressions and felt an instant emotional connection? That spark often comes from well-captured facial expressions. Mastering Emotion isn’t just about pencil technique—it’s about understanding the soul behind the sketch. This article dives deep into fresh ways to breathe life into your drawings, revealing how subtle changes in line, form, and nuance can turn a flat face into a living presence.
Whether you’re a beginner learning to draw eyes that shine with feeling or a seasoned artist seeking new methods, you’ll find genuine, valuable insights here. Let’s jump right in and unlock the secrets of expressive sketching!
TRENDING
Unleash Your Inner Queen With Baddie Coloring Pages
Why Emotion In Sketching Matters
- Creates a Connection
People relate to faces—our brains are wired to read them. A well-drawn emotion bridges the gap between artist and viewer. - Tells a Story Without Words
A furrowed brow or a gentle smile can speak volumes. You don’t need lengthy captions when the face itself communicates. - Sets Your Work Apart
Technique is everywhere—emotion is what gives your sketch its character, making it memorable and impactful.
Understand The Basics: Anatomy & Emotion
To capture true emotion, you need to understand the underlying structure:
- Facial Muscles 101
Key muscles like the zygomaticus major (for smiling) or the corrugator supercilii (for frowning) shape expressions. - Landmarks and Proportions
Identify reference points: brow ridge, orbital sockets, cheekbones, nose bridge, lip line, and jawline. These guide emotion overlays. - Neutral vs. Dynamic Poses
Start with a neutral face to establish proportions, then exaggerate or soften lines to express emotions naturally.
The Expression Essentials
Here’s a breakdown of how different emotions manifest in the face—and how to sketch them convincingly:
Happiness & Joy
- Eyes: Slight upward curve (“Duchenne smile”) with possibly crinkled corners.
- Mouth: Corners of the lips lift; teeth can show.
- Cheeks: Puff up subtly, often merging with the eye area.
Sadness & Melancholy
- Eyes: Can appear slightly droopy; irises may gaze downward.
- Brows: Inner edges tilt up toward the forehead.
- Mouth: Corners may barely droop or purse inward slightly.
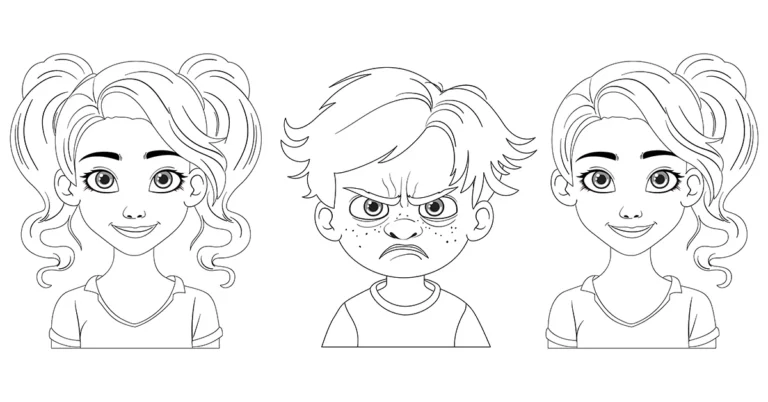
Anger & Frustration
- Brow: Heavily furrowed, with strong vertical lines between.
- Eyes: Narrowed, often staring intensely.
- Mouth: Lips pressed tight or slightly open in a snarl.
Surprise & Shock
- Eyes: Wide open with visible whites above and below the iris.
- Brows: Lifted high, creating space on the forehead.
- Mouth: Gaped, sometimes teeth showing; jaw dropped.
Fear & Anxiety
- Eyes: Wide, but brows drawn together—combination of surprise and tension.
- Mouth: Lips parted; lower jaw may jut forward slightly.
- Cheeks: Taut, pulling lines toward the ears.
Subtlety Versus Exaggeration
Finding balance is key. Depending on your style and purpose, you can:
- Push for Boldness: For cartoon styles, amplify brows, eyes, mouths for impact.
- Stay Nuanced: In realistic art, minor shifts—like a faint brow furrow—carry emotion.
- Blend Both: Graphic novels often walk this line, using stylized shapes with realistic shading.
Pro Tip: Layer your sketches. Start loosely with minimal expression, then gradually build tension through refined lines.
Tools & Techniques For Lifelike Emotion
Gesture and Thumbnail Sketches
Quickly capture poses and emotional energy. These sketches help you envision movement and intensity before refining details.
Reference Overload
Use references from films, photographs, or life studies. Pay attention to lighting, mood, and expression combination.
Dodge the ‘One Trick Pony’ Method
Avoid memorizing expressions in one formula. Emotions differ based on age, personality, context. Observe variety.
Build Emotion in Layers
Block-in structure: Basic head shape and features.
Plot emotion: Mark brows, eyes, and mouth positions.
Detail & refine: Shade, readjust proportions, smooth tensions.
Highlighting Through Contrast
Lightest highlights on wet eyes, dent in the chin. Dark shadows in eye sockets or under brows amplify mood.
Exercises To Boost Emotional Fluency
Emotions in a Minute
Set a timer for 60 seconds. Sketch a face expressing joy, anger, sadness—do this for each one. Speed helps you focus on essentials.
Expression Flip
Draw a surprised face. Then flip it upside down—retrace it! The surreal alignment reveals if your expression feels natural.
The Expression Mosaic
Draw nine small squares. Assign a different emotion to each—happy, fearful, coy, skeptical, etc. Explore unique combinations.
Live Model Sketches
Watch a friend or family member while they react naturally. Capture their expressions in 1–2 minute sketches without lifting your pencil.
Before & After Storytelling
Sketch an emotionless face. Then imagine a situation (someone receiving bad news). Add expression details in stages.
Common Pitfalls & Fixes
- Overworked Eyes
Avoid drawing too many lines around eyes; subtly is stronger. - Rigid Mouth Corners
Corners shouldn’t snap straight; they curve and soften even in tight lips. - Stiff Brows
Brows mirror emotion: tight brows in anger; relaxed, raised in surprise. A little slope goes a long way. - Feature Misplacement
Expression alters proportions. Raised brows may reduce forehead; wide eyes may pull cheeks. Re-adjust accordingly. - Uniform Application
People express uniquely. Cultural background, face shape, age—all influence emotion. Observe a range.
Putting It All Together
Choose Your Character
Determine age, gender, mood, backstory.
Explore Key Expressions
Sketch 4–5 emotion variations.
Refine with Structure
Use proportional guides, check symmetry and head tilt.
Add Depth
Shade with intention—under brows, along cheeks, to accentuate emotions.
Review & Iterate
Step away, return later. Notice distortions or unintended expressions and adjust.
Colour & Context (Optional)
If working in color, use warm tones for joy, blues for sadness. Surround context enhances the emotional story.
Why This Fresh Take Works
- Holistic Approach: We merged anatomy, psychology, and storytelling.
- Practical Tips: Exercises keep your skills sharp with real results.
- Balanced Flexibility: It works for expressive cartoons and fine art alike.
- Observation is Key: Using real life and emotional study breeds authenticity.
Conclusion
Emotion is the heartbeat of a portrait. It’s not just about Sketching Facial Expressions about connecting. By focusing on anatomy, expression subtleties, layered construction, and hands-on exercises, you’ll elevate your art from flat sketches to soul-touching faces. Keep experimenting, observing, and refining—and you’ll find your sketches carry weight and meaning in every line.
ALSO READ: Turn Imagination Into Detail: Drawing Realistic Dragon
FAQs
What is the best way to start learning expressions?
Start with gesture thumbnails—not full details. Capture big shifts in brows, eyes, and mouth. Keep them uncluttered, then layer in fine details.
How much should I exaggerate emotions in realistic sketches?
Go subtle. In realism, small changes—like a slight eye tilt or mouth quiver—can evoke strong emotion without being over-the-top.
Should I use photo references or draw from life?
Both. Photos give clarity and freeze momentary expressions, while live drawing teaches you subtle shifts and timing you can’t capture in stills.
Can I apply these techniques to cartoon or anime styles?
Absolutely. The principles remain consistent—adjust form, tone, and detail for your style. In cartoons, push shapes; in anime, emphasize eyes and hairline shapes.
Why do some emotional sketches feel ‘off’?
Usually due to misaligned proportions or over-detailing. Take a step back: Does the feeling hit you first, or do you notice odd lines? Simplify, re-balance, and ensure emotional intent is clear before refining.